So, you’ve got a rubber plant in your cozy corner, and you’re wondering if it’s time to give it a bit more space to stretch its roots? You’re in the right place! In this article, we’re going to talk about the ins and outs of repotting rubber plants—the when, the why, and the how. Grab your gardening gloves, because we’re about to get our hands dirty and help your rubber plant thrive!
When and How Often Should You Repot Your Rubber Plant?
Signs Your Rubber Plant Needs Repotting
Your rubber plant isn’t one to complain, but it does give you a few subtle hints when it’s feeling a bit cramped in its pot. Keep an eye out for these signs:

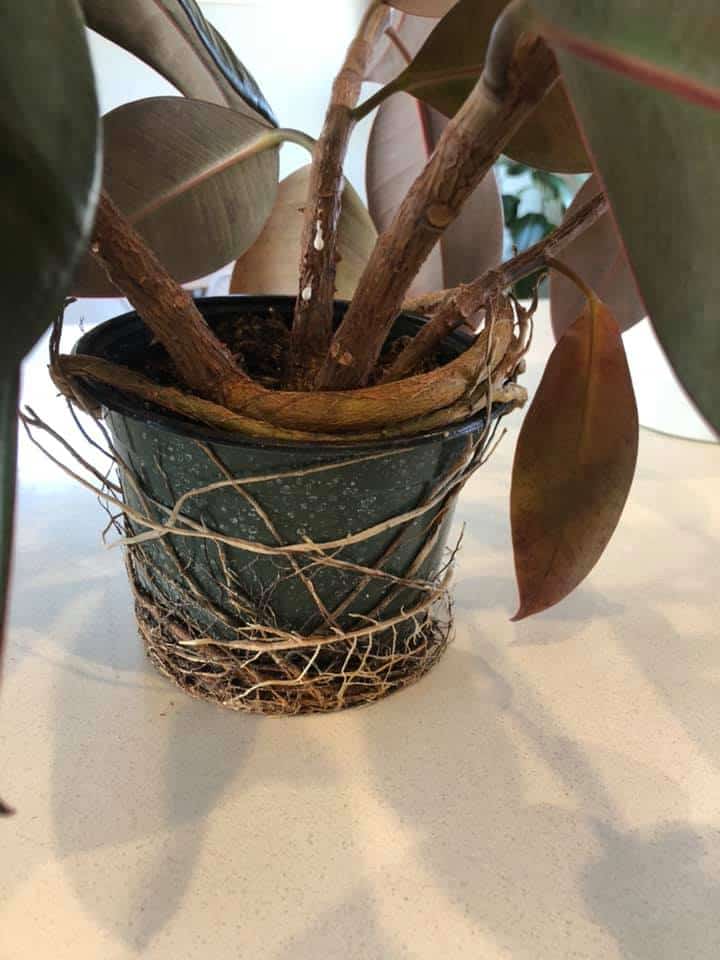
- Roots Sneaking Out: If you see roots peeking out from the drainage holes or circling the top of the soil, your rubber plant is trying to tell you it’s time for a change.
- Slow Growth: Has your rubber plant stopped growing or slowed down considerably? This could be due to a lack of room for its roots to spread.
- Pot Bound: When you carefully ease the plant out of its pot and notice a tight, dense mass of roots encircling the soil, you’ve got a clear case of root binding. To some extent, Rubber plants like to be root-bound, but once you notice hindered growth, get a new pot!
Best Time to Repot Rubber Plants
Timing is everything, even in the world of rubber plants. The ideal time to repot your rubbery friend is during its growing season, which typically spans from spring to early summer. Why? This is when your plant is at its most active, and it’ll recover faster from the transition.
What Do You Need for Repotting Rubber Plants?
Choosing the Right Soil
When it comes to choosing the right soil, your rubber plant is quite picky. It prefers a well-draining potting mix, and you can’t go wrong with a blend of peat moss, perlite, and a bit of pine bark. This combo ensures your plant’s roots have room to breathe while retaining just the right amount of moisture.
However, if you prefer commercial potting mixes, this one from amazon could work very well.
Choosing the Right Pot
Selecting the perfect pot is like finding the right-sized shoes – it’s got to be just right. Opt for a pot that’s 1-2 inches larger in diameter than the current one. Make sure it has drainage holes at the bottom to prevent waterlogged roots.
Other Tools
Gather your gardening gear before you dive in:
- Gloves: Protect your hands from dirt and any prickly surprises. The sap in the leaves of your rubber plants contains latex which can irritate skin, so putting on some gloves is always a good idea.
- Trowel: A small, hand-held trowel will make digging and scooping soil a breeze.
- Pruners: In case you need to trim any damaged or overgrown roots during the repotting process.

Repotting Rubber Plants Step-by-Step
Now, let’s roll up those sleeves and get to the nitty-gritty of repotting your rubber plant:
- Water Your Plant: Give your rubber plant a good drink a day or two before repotting. This helps loosen the soil and minimizes stress on the plant.
- Remove the Plant: Gently tip the pot on its side and slide out the plant. If it’s stubborn, tap the sides of the pot to loosen it, but be patient. Your rubber plant has feelings, too!
- Inspect the Roots: Take a look at those roots. If they’re tightly packed and encircling the soil, it’s time for action. If not, consider repotting anyway if your plant has been in the same pot for several years.
- Trim the Roots: If your rubber plant is root-bound, use pruners to trim away the congested roots. Don’t be shy; they’ll grow back.
- Prepare the New Pot: Add a layer of fresh potting mix to the new pot, ensuring there’s enough space for the root ball.
- Transplant Your Plant: Gently place your rubber plant in its new home, ensuring it sits at the same depth as it did in the old pot. Fill in the gaps with more potting mix, pressing it down gently as you go.
- Water Thoroughly: Give your rubber plant a good soaking. This helps settle the soil and removes air pockets around the roots.
- Post-Repotting Primp: Remove any dust from the leaves with a damp cloth and, if you’re feeling generous, give them a little shine with some leaf conditioner.
Aftercare
You’ve done it! Your rubber plant is in its new, roomier digs, and it’s ready to thrive. But the journey doesn’t end here. You need to check on your repotted rubber plant frequently. It might drop a few leaves, but if you did everything with proper care, should not go into transplant shock. Keep these in mind:
- Water with Care: Wait for the top inch or so of the soil to dry out before watering. Rubber plants prefer to be slightly on the dry side rather than waterlogged.
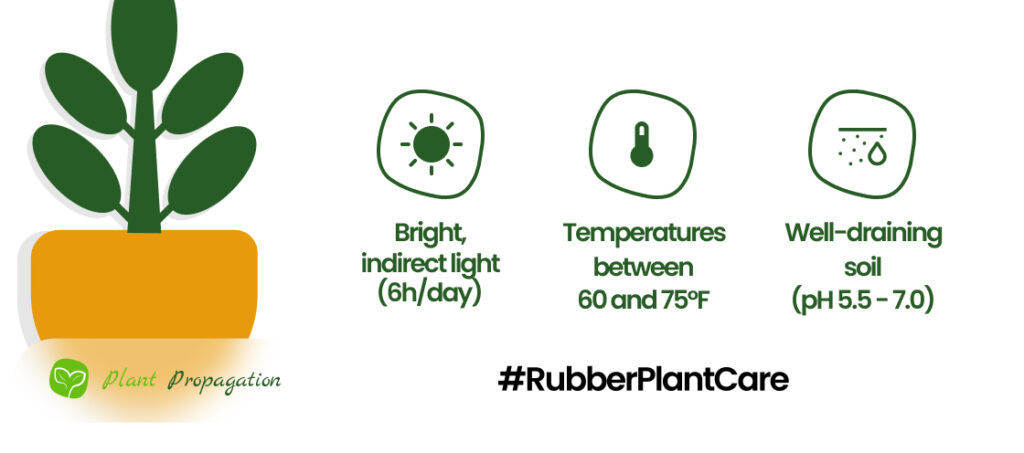
- Light Requirements: Place your repotted rubber plant in bright, indirect light. Avoid harsh, direct sunlight, as it can scorch those gorgeous leaves.
- Monitor Growth: Keep an eye on your plant’s growth over the next few weeks. If it starts showing signs of new growth, you know you’ve done your job well!
- Check for Pests: Occasionally inspect your plant for any unwanted guests, like spider mites or mealybugs, and treat them promptly if found.

And there you have it—your rubber plant is now happily settled in its new home, ready to reach for the stars (or at least the ceiling). Repotting may seem like a chore, but it’s an essential part of plant parenthood, ensuring your leafy friend continues to thrive and bring a touch of greenery to your space. Happy gardening!
Frequently Asked Questions
Rubber plants tend to be speedy growers, which is why it’s a great idea to give them a little check-up in the spring. Look out for those roots peeking out of the nursery pot—when you spot them, it’s a clear sign that it’s time for a repotting session. This ensures that your rubber plant’s roots have ample space to stretch out, take in all those vital nutrients, and thrive to their fullest potential.
Do rubber plants like to be root-bound?
Rubber plants like being slightly root-bound, but if you see signs of stunted growth or roots poking out of the drainage holes, it is time to repot.
Can I plant two rubber plants together?
Many people choose to pot two rubber plants in the same pot to get a fuller plant. It can definitely work, but make sure you choose the right pot and keep the yearly repotting schedule!
Do rubber plants like humidity?
Rubber plants love humidity. They are tropical plants, thus they do not do well in dry conditions. Make sure the humidity level stays around 50%.
Do rubber plants like big pots?
Always choose a pot that gives your rubber plant a bit of a room to grow. No need to go big here, because they like being slightly root-bound.
How do you water a rubber plant after repotting?
Once you are finished with repotting your rubber plant, give it a good shower! This will help your plant to settle into its new environment faster.
