Bromeliads are a charming addition to any indoor or outdoor garden. These exotic plants with their striking foliage and unique, often vibrant blooms, can bring a touch of the tropics to your living space. Like all plants, bromeliads sometimes need a change of scenery. In this article, we’ll dive into the nitty-gritty of repotting bromeliads, exploring when and why you should transplant them, how to choose the right pot and soil, step-by-step repotting instructions, and essential aftercare tips. So, grab your gardening gloves, and let’s get started!
Should I transplant my bromeliad?
Let’s address the million-dollar question first: should you transplant your bromeliad? Well, the answer isn’t one-size-fits-all. Some Bromeliads spend their life in the same pot. They don’t require frequent repotting like some other plants, because their root system is relatively small. However, there are certain situations where repotting becomes a must:
- Overcrowding: If your bromeliad has outgrown its current pot and looks cramped, it’s time for an upgrade. Overcrowding can hinder growth and even lead to root rot.
- Declining health: If you notice your bromeliad’s leaves turning brown, wilting, or showing signs of disease, repotting can help remove any infected soil and provide a fresh start.
- Aesthetic reasons: Maybe you just want to freshen up your plant’s look or give it a new home decor makeover. Nothing wrong with that!
- Propagating a new plant from a pup: You can use an offshoot to propagate a whole new plant in a new pot.
When should a bromeliad be repotted?
Timing is crucial when it comes to repotting bromeliads. You don’t want to disturb them during their blooming time. The best time to repot your bromeliad is in the spring or early summer when they are actively growing. Also, avoid repotting during the dormant winter months, as it can stress the plant.
Choosing the right pot and soil
Now that you’ve made sure it’s time for a transplant, let’s talk pots and soil. The right pot and soil mixture is essential for your bromeliad’s well-being.
- Pot size: Go for a pot that’s only slightly larger than the current one. Bromeliads like to be cozy. A pot with a diameter 1-2 inches larger than the current one should suffice.
- Pot material: Opt for a pot with good drainage. Terra cotta or ceramic pots work well because they allow excess water to evaporate. Ensure the pot has drainage holes at the bottom.
- Soil mix: Bromeliads are epiphytic plants, meaning they don’t need soil like traditional plants. Instead, use a well-draining mix that consists of orchid bark, perlite, and sphagnum moss. Avoid heavy potting soils as they can retain too much moisture. If you are looking for a commercial mix, this one on Amazon is specifically made for Bromeliads.

Repotting Bromeliads step-by-step
Now, let’s dive into the repotting process. Follow these simple steps, and your bromeliad will be happily settled in its new home:
1. Gather your supplies
- New pot with proper drainage holes
- Well-draining soil mix (orchid bark, perlite, sphagnum moss)
- Gardening gloves
- Pruning shears

2. Prepare the new pot
Fill the new pot with your well-draining soil mix, leaving enough space at the top for the bromeliad’s base. Press down lightly to remove air pockets.
3. Remove the bromeliad from its old pot
Gently turn the old pot sideways and tap it to ease the bromeliad out. If it’s stubborn, you can carefully slide a knife around the inside edge to loosen it. Be gentle to avoid damaging the plant.
4. Examine the roots
Inspect the roots for any signs of rot or damage. Trim away any unhealthy roots with clean pruning shears.
5. Plant in the new pot
Place the bromeliad in the center of the new pot, ensuring the base of the plant is slightly above the soil level. Add more soil mix around the sides, gently patting it down as you go to secure the plant.
6. Water sparingly
Water the newly potted bromeliad lightly to settle the soil, but avoid drenching it. Bromeliads are sensitive to overwatering, so let the soil dry out slightly between waterings.
Aftercare
Congratulations! You’ve successfully repotted your bromeliad. But your job isn’t done just yet. Proper aftercare is crucial to help your bromeliad adjust to its new home:
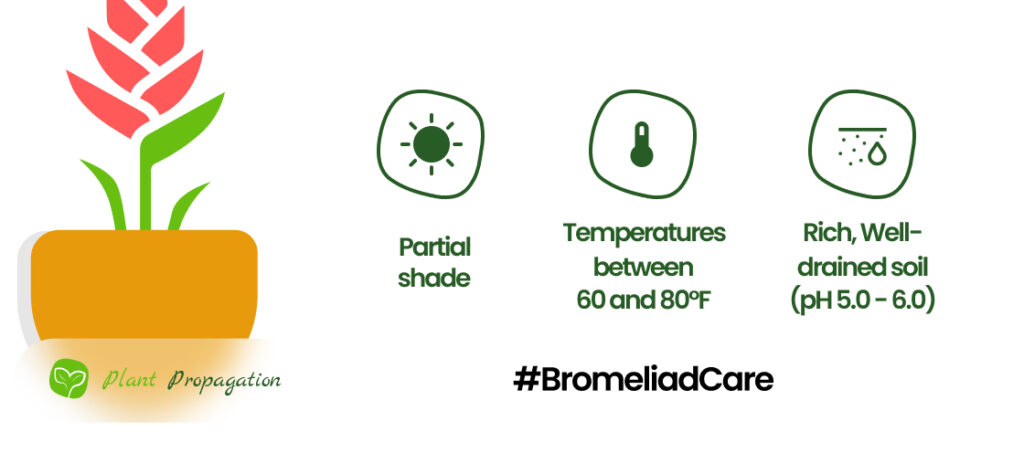
- Light: Place your bromeliad in bright, indirect sunlight. They love filtered natural light, so avoid direct sun, which can scorch their leaves.
- Humidity: Bromeliads thrive in humid conditions. If you can’t ensure around 50% humidity, mist the plant regularly or place a tray of water with pebbles near the plant to increase humidity.
- Watering: Water your bromeliad by filling its central cup with water. Ensure the cup doesn’t overflow, and empty it periodically to prevent stagnation. Bromeliads are pretty sensitive to root rot.
- Fertilizing: Feed your bromeliad sparingly with a diluted, balanced liquid fertilizer every 2-3 months during the growing season. Remember, they don’t require much fertilizing.
- Temperature: Keep your bromeliad in a warm environment, ideally between 60-80°F (15-27°C). Protect it from cold drafts!

Repotting your bromeliad can be a rewarding experience, ensuring its continued health and vitality. By following the right steps, choosing the correct pot and soil, and providing proper aftercare, you can enjoy the beauty of these exotic plants for years to come. So, go ahead and give your bromeliad a fresh start in a new pot – it will thank you with lush foliage and stunning blooms. Happy gardening!
Frequently Asked Questions
You don’t want to disturb them during their blooming time. The best time to repot your bromeliad is in the spring or early summer when they are actively growing.
Do bromeliads like to be root bound?
Bromeliads with their small roots like to be slightly root-bound, and this is why many of them will spend their life in the same pot.
Do bromeliads like full sun?
Most bromeliads grow best in indirect light, so avoid giving them full sun.
Do bromeliads need big pots?
Bromeliads with their small roots like to be slightly root-bound, thus they don’t need huge pots. In fact, big pots can hinder their growth.
