Orchids, those elegant and exotic beauties, are known for their captivating blooms that can brighten up any space. But like all living things, even orchids need a little TLC from time to time. One crucial aspect of orchid care is repotting. If you’re wondering when and how to repot an orchid, fear not! We’re here to guide you through this green-thumbed adventure with a casual tone and friendly advice.
When Should I Repot My Orchid?
First things first, let’s talk timing. You don’t just want to uproot your orchid on a whim. These gorgeous plants are quite particular about their repotting schedules.
1. When the Roots Get Crowded: Orchids should be repotted when their roots start to outgrow their current home. If you notice roots escaping from the pot’s drainage holes or circling the surface, it’s time for a change.
2. After the Blooms Fade: As far as timing goes, you should do the repotting after your orchid has finished flowering. This usually happens once a year, but the exact timing varies depending on the orchid species.
3. If You See Rotten Roots: If you spot mushy, black, or brown roots, it’s a sure sign of root rot. In this case, don’t wait—repot your orchid ASAP to save it.
Preparations
Now that you know when it’s time to repot, let’s dive into the preparations. You don’t want to go into this operation without the right gear!
Choosing the Right Pot
Picking the right pot for your orchid is crucial. Here are some tips:
- Opt for a Transparent Pot: Clear plastic or glass pots are great choices because they allow you to monitor your orchid’s root growth. You’ll know when it’s time for the next repotting.
- Make Sure it has Drainage Holes: Proper drainage is key for orchids. Always choose a pot with multiple drainage holes to prevent waterlogged roots. Some of the best orchid pots have holes on the sides as well.
- Size Matters: Go for a pot that’s only slightly larger than the one your orchid is currently in. Orchids like being a little cozy, and too much space can lead to overwatering problems.
Choosing the Right Soil
Orchids don’t play well with regular potting soil. They need something special. Orchid potting mix is what you’re after. Look for a mix designed for your specific orchid type, whether it’s a phalaenopsis or a cymbidium. These mixes typically contain ingredients like bark, perlite, and sphagnum moss to provide excellent drainage. We usually go for this Orchid potting mix.
The Tools You’ll Need
You don’t need a fancy gardening shed full of tools to repot an orchid. Here are the essentials:
- A Clear Workspace: Lay down some newspaper or a drop cloth to catch any mess.
- Pruning Shears: To trim any dead or unhealthy roots. Make sure you clean them with bleach before use.
- Gloves: Orchids are delicate, and you want to minimize contact with your skin to avoid contamination.
- Orchid Potting Mix: As mentioned earlier, this is the special blend your orchid needs.
- Your Chosen Pot: Make sure it’s clean and ready for action.

How to Repot an Orchid Step-by-Step
Alright, let’s get our hands dirty—figuratively speaking. Repotting an orchid might sound like a tricky operation, but it’s quite manageable with the right steps:
- Soak Your Orchid. Submerge the entire pot in a container of room-temperature water for about 10-15 minutes. This hydrates the roots and makes them more pliable.
- Gently remove your orchid from its current pot. If it’s stuck, you can gently tap the sides of the pot to loosen the root ball. If the roots are tightly wound around the pot, you might need to cut the pot away.
- Inspect and Trim the Roots. Healthy ones should be plump, green, or silvery. If you spot any mushy or dead roots, use your sterilized pruning shears (or a scissor) to trim them off. Don’t go overboard; just remove the damaged parts.
- Prepare the New Pot by adding a layer of orchid potting mix to the bottom. This helps create a stable base for your orchid.
- Gently place your orchid in the new pot, positioning it so the base of the plant is just below the pot’s rim. Make sure the top of the roots is level with the pot’s edge.
- Fill in the gaps around the orchid with more potting mix. Use your fingers to gently press the mix down, ensuring there are no air pockets. You want the orchid to be snug but not too tightly packed.
- Water thoroughly until water flows out of the drainage holes. This helps settle the potting mix and ensures the roots have adequate moisture.
Caring for your Orchid after Repotting
Now that you’ve successfully repotted your orchid, it’s time to discuss post-op care:
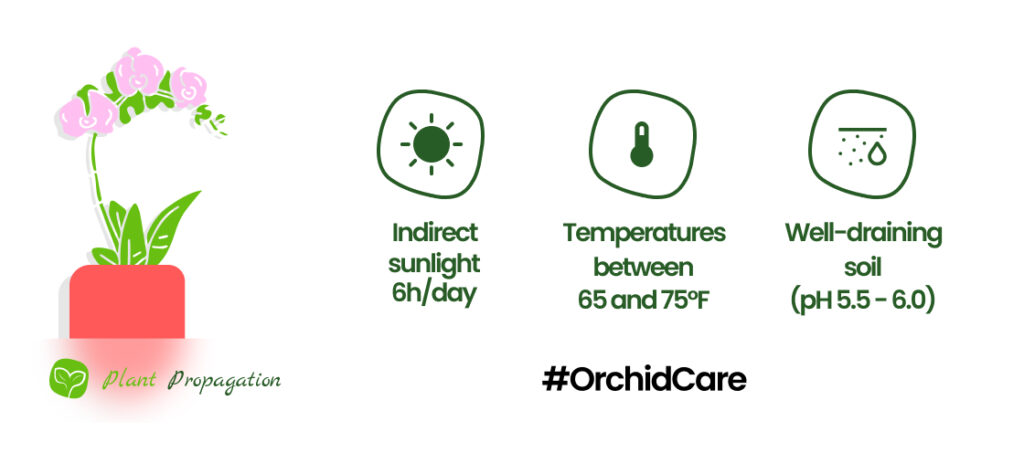
- Place it in the Right Spot: Orchids love bright, indirect light (at least 6 hours/day). Avoid direct sunlight, which can scorch their leaves.
- Keep the Humidity Up: Orchids thrive in a humid environment. You can achieve this by placing a tray of water near your orchid or using a humidity tray.
- Don’t Overwater: Overwatering is a common mistake. Allow the top inch or so of the potting mix to dry out before watering again.
- Watch for Pests: Keep an eye out for common orchid pests like mealybugs and spider mites. Treat any infestations promptly.
- Be Patient: Your orchid may take a little time to adjust to its new home. Don’t worry if it doesn’t bloom right away; it will reward your care with beautiful blooms when it’s ready.

In conclusion, repotting an orchid might seem like a daunting task, but armed with the right knowledge and a bit of patience, you can keep your orchid thriving for years to come. Remember, it’s all about giving your orchid the right home, just like finding the perfect spot for a beloved pet. So, go ahead, give your orchid a fresh start, and watch it flourish in its cozy new pot. Happy gardening!
Frequently Asked Questions
A pretty clear sign that you need to repot your orchid is when the roots of your plant visibly push the plant above the rim of the pot. Overcrowding is not ideal for them.
Do you bury air roots when repotting orchids?
You should keep the air roots above the soil when you are repotting your Orchid. However, covering a few of them won’t kill your plant.
Why is my orchid dying after repotting?
Orchids are very sensitive to soggy soil, so that is the first thing you should check on if you see signs of sickness after repotting. The soil needs to be well-draining.
How long does it take for an orchid to recover after repotting?
If you’ve done the repotting correctly (pay attention to choosing a well-draining potting mix, a properly sized pot, and 6 hours of indirect sunlight), your Orchid should get back to its former glory in about 2 weeks.

