If you’re a plant parent, you know that your leafy green friends can sometimes outgrow their pots, just like kids outgrow their shoes. When your spider plant starts showing signs of distress, it’s time to give it a new home. In this guide, we’ll take you through the process of repotting your spider plant, step by step. Don’t worry, it’s easier than you think!
Sings you need to repot your Spider Plant
Before you dive into repotting, let’s talk about how to tell when your spider plant is in dire need of a roomier pot.
Sign #1: Overgrown, cramped roots
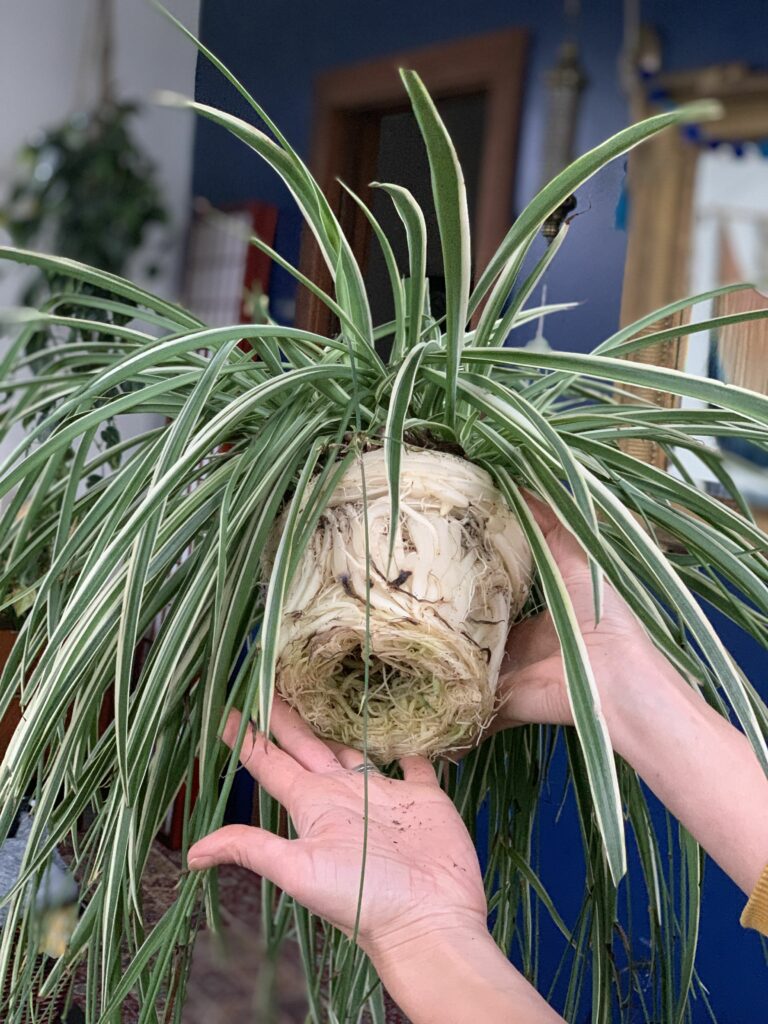
Your spider plant’s roots need space to grow, just like you need room to stretch your legs. If you notice the roots circling the inside of the pot or poking out of the drainage holes, it’s a clear sign they’re feeling cramped.

Sign #2: Stagnant Growth
Is your once-vibrant spider plant looking a bit lackluster? Stunted growth is another indicator that it might be time for an upgrade. When the roots run out of room to spread, your plant’s growth can become stunted, resulting in smaller leaves and fewer pups.
As a matter of fact, we have a full list of things that you can try to make your Spider Plant bushier.
Sign #3: Ruined Soil
Over time, the potting mix in your plant’s container breaks down, becoming compacted and less effective at holding water. If you find the soil crumbling or turning into a hard, impenetrable mass, your spider plant is likely struggling to get the nutrients and moisture it needs.
When to repot your Spider Plant
Timing is crucial when it comes to repotting your spider plant. The best time to do it is in the spring or early summer when your plant is entering its active growth phase. This gives it the best chance to recover quickly and thrive in its new pot. Avoid doing this in the winter.
Tools You’ll Need
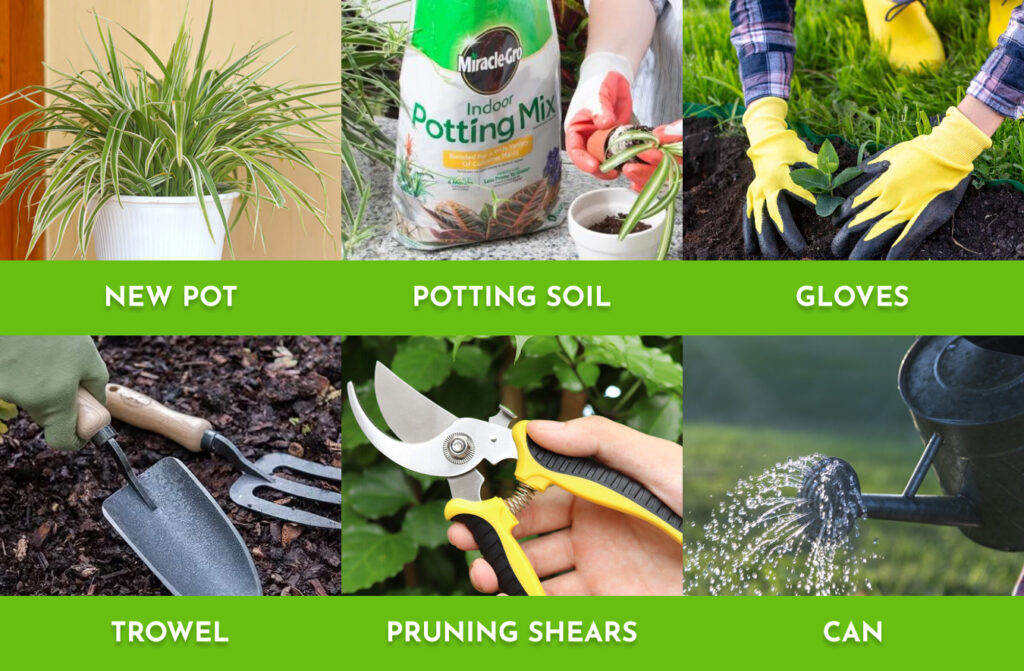
Before you get your hands dirty, gather these essential tools:
- A larger pot: Choose a pot that’s one size larger than the current one to give your spider plant room to grow. Spider Plants like to be root-bound a bit, so do not choose an overly large pot.
- Fresh potting mix: Opt for a well-draining mix specifically formulated for houseplants, like this one.
- Gloves: Protect your hands from dirt and potential allergens.
- Trowel: Essential for digging and scooping soil.
- Pruning shears: You may need these to trim any dead or damaged roots.
- Watering can: For a good soak after repotting.

How to Repot a Spider Plant Step-by-Step
Now, let’s get to the fun part – repotting your spider plant! Follow these steps, and your green companion will be thanking you in no time.
- Choose the Right Pot: Start by selecting a new pot that’s one size larger than the current one. Make sure it has drainage holes to prevent overwatering. A pot that’s too big can lead to waterlogged soil, so don’t go overboard with size.
- Prepare the New Pot: Fill the bottom of the new pot with fresh potting mix, leaving enough space to accommodate your spider plant’s root ball. The goal is to have the top of the root ball sit about an inch below the rim of the new pot.
- Remove the Plant: Gently remove your spider plant from its current pot. If it’s stubborn, you can tap the sides of the pot or use a trowel to loosen the soil.
- Inspect the Roots: Check the root system for any signs of disease, damage, or overcrowding. Trim away any dead or rotting roots with clean scissors or pruning shears. This step ensures your plant has a fresh start in its new home.
- Reposition in the New Pot: Place your spider plant in the center of the new pot, making sure it’s at the right height so that the top of the root ball sits about an inch below the pot’s rim.
- Fill with Soil: Gently fill the space around the root ball with fresh potting mix. Pat the soil down lightly to eliminate air pockets but avoid compacting it too much. Leave a small gap at the top to accommodate watering.
- Water Thoroughly: Give your newly potted spider plant a good soak to help settle the soil and hydrate the roots. Allow any excess water to drain into the saucer or tray.
- Place in Ideal Conditions: Put your spider plant in a spot with bright, indirect light. Spider plants thrive in these conditions. Avoid placing them in direct sunlight, as it can scorch their leaves.
Aftercare
Continue to care for your spider plant as usual, including regular watering and occasional fertilization. Be mindful not to overwater, as this can lead to root rot.

Frequently Asked Questions
Choose a pot up to one-third larger than your plant’s root ball. Spider plants like to be a little bit root-bound, so do not go for huge pots.
How to repot a root bound spider plant?
If you want to repot your root-bound spider plant, remove it from its current pot, loosen its roots with your fingers so they are not that tangled up and ready to grow in the new pot. Optionally, you can cot off any roots that are too long. Put it in its new container that is no larger than about an inch in diameter than the previous pot and fill it up with potting mix. The last step is to water your spider plant thoroughly.
What kind of soil does a spider plant need?
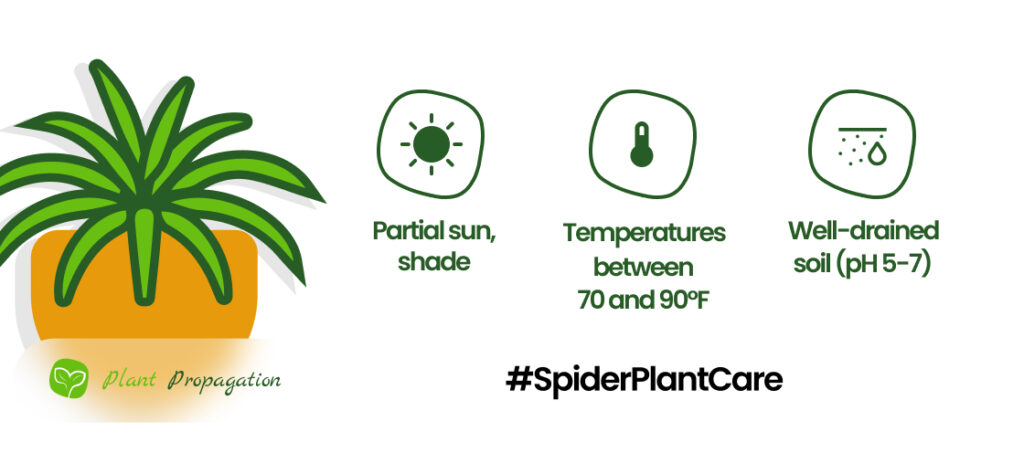
Spider Plants thrive in nutrient-rich, loose potting soil (pH 5- 7) that drains well, but also can retain some moisture. Mix 2 parts of normal potting mix and 1 part perlite and 1 part bark.
Can I repot a spider plant in water instead of soil?
Spider Plants prefers nutrient-rich, loose potting soil to water when it comes to propagation.

